DIY

A French Farmhouse Bathroom

Hi folks!

As promised, I wanted to share the results of our #QACottage upstairs unit gut job. I’ll start with the bathroom.

I’m even more excited to dig into the reveal of this unit, as opposed to the lower unit, because we put a lot of extra TLC (and expense) into it, since we thought we were going to live there with our baby girl for the next few years.

Here is the bathroom BEFORE:

I should note that you had to enter it through the master, and it is/was the only restroom in the unit. Glad those days are over! The most significant change we made was to move the door from the bedroom wall to the kitchen wall and widen it a touch.

To set the mood, let me share with you some inspiration images. I was kind of going for a French farmhouse vibe, with a combination of black and white with rustic wood and yellow pops. I know, I’m the only one doing farmhouse. I was then planning to add plants and art, but as mentioned in my last post, we rented out the place before I got to fully zhush.

Without further ado … the inspiration images.

– M O O D – 

(click picture for source!)

– N A R R O W I N G  I T  D O W N –

I had my heart set on a double-faucet vintage trough sink. The reasons are aesthetic as well as practical. We didn’t have enough width in the bathroom for a double vanity, but my marriage depended on that extra source of water before bed each night.

I love the exposed basin of the trough sink, but I knew I needed all the storage I could get. I set out to find a cool rustic wood base that could also have storage.

I decided to use this image as my main inspo, designed by Tiffany Farha Designs:

Here was my highly official sketch:

Other details…

Wall storage:

Flooring:

Instead of checkered floors, I did a linen-finish tile with a checkered rug that I could take with me whenever we moved.

Lighting:

I really wanted hanging pendant lights on each side of the mirror, but because of the proximity to the shower, it would’ve been an electrocution hazard. And trust me, I was willing to risk it, but Tristan reminded me that tenants could sue us, which didn’t sound so great.

Spoiler alert: I probably will not get to do hanging pendants until house after our new one we just bought. UG! I have cried real tears over this. I will do a dedicated post about all of my very favorite pendant light bathrooms, which I think will help with the grieving process.

Shower Curtain:

Our clawfoot tub was just BEGGING for this stunning shower curtain that has been floating around Pinterest since its early years –

Now that the groundwork has been laid, I can’t wait to show you how it all turned out! Come on back for the full reveal :).

-t&T

Meet Our New Home

Happy Monday, everyone!

Days of the week are mostly meaningless to me, now that I’m on maternity leave.

However on Saturday, Tristan and I plus baby had our first family outing that wasn’t home renovation related! I had the BEST time. We searched for estate sales and garage sales, had lunch, came home and napped … is this what life can be?

It was probably one of the very first family outings since Tristan and I have known each other. On weekends we weren’t working on the house, we typically had friend or family plans. Very excited for more family days this summer :).

I’m also very excited to introduce you to another new addition in our lives.

Meet our new #BallardHomeBase

It’s in the Ballard neighborhood of Seattle, where I lived before I met Tristan, and is around 2,200 square feet with 4 BR / 3 BA. I call it “home base” because it’s our home for the indefinite future – we may buy other properties to renovate and rent out, but this one’s for us :).

The garage has been converted into a studio unit that is currently rented out by our friend Val. There’s a real fenced yard and en suite bathroom – two rarities in Seattle! And don’t even get me started on the sunroom.

___

One question we’ve received a lot: “I can’t believe you moved! Are you bummed that you just finished a two year long renovation, and you don’t even get to enjoy your new space?”

The answer is no.

The housing market here is bonkers, and we’re thrilled to be out of the rat race.

Tristan is on Redfin as a hobby several times a day (kind of like how some mindlessly scroll through Facebook). We’d tour houses or make offers from time to time as we’d come across a Forever Home potential.

To finally have “won” a house, and know that we won’t have to drop everything and quickly tour a house, make an offer, make sure financing is approved, and then ultimately lose out to foreign all-cash investors – while juggling a newborn – feels FANTASTIC. The pros of moving definitely outweigh the cons.

(For those who aren’t aware, our Queen Anne Cottage is actually two 600 sq. ft. units, so our time was extremely limited there, anyway.)

I do feel a teeny bit bummed because I don’t have fully staged AFTER photos of our Queen Anne Cottage to share.

We lived upstairs for a few weeks and moved out before I had art on the walls or all of my decor pieces in place. So can you just use your imagination when I say so? And per usual, I have TONS of inspiration photos to show you to help along the way. 🙂

I’ll get full house tours up of each house on the blog at some point but the first room I’ll share is the QA Cottage Bathroom! Stay tuned.

-t&T

Remodel and Living Room Decor Update

And just like that, I felt like blogging again. I think it was a combination of me finally decorating for a holiday again (Halloween & Harvest reveal coming soon) and that the remodel of our downstairs unit is finally starting to look exciting.

Here’s our progress report.

Before (on demo day, August 2014):

DEMO (2) basement 8

After (looking same direction, taken this week):

photo

In the interim, while NOT helping out with the remodel, I started decorating upstairs a bit more. Our our plan has always been to live upstairs while redoing the downstairs unit, move downstairs while we redo the upstairs unit, then move back upstairs and rent out the downstairs. So, you can imagine why I was hesitant to put a ton of effort into decorating and/or purchasing furniture for the upstairs unit before all of said moves. Well, I got over it, and I’m glad I did.

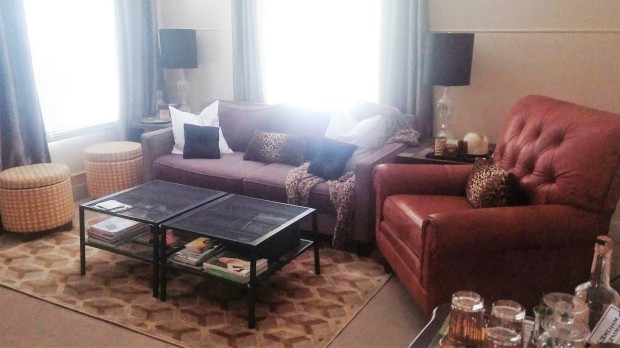
Here was my original inspiration. I bought curtains, a leather chair and a rug for the living room, and procured this amazing table at a garage sale that converts from a console to a dining room table that seats up to 8. It even stores 4 chairs inside the base. It’s like that IKEA one everyone has, on crack. It’s solid wood and I don’t think I’ll ever be able to part with it.

Here is how the living room looked right after we moved in. It stayed in this sad little form for a good six months.

1019141551

And here is the last full length picture I took of my living room when it was clean.

T&T Updated Living Room

I’ve since rearranged the pillows and added cognac leather chair in the corner. Here’s two fuzzy snapshots to give you an idea.

USE ME (4)

T&T Updated Living Room

I also had two parsons chairs reupholstered, so you can see those and my console/dining table in my upcoming Halloween decor reveal!

Thanks for tuning in.

-t&T

T&T

Color Crush: Forest Green and Salmon Pink

Lately, I’ve been trying to think of fun color combinations that I can integrate into our master bedroom now and future home. Color combinations that aren’t trendy, per se, and aren’t too bold to scare Tristan away. We have mostly neutrals in our bedroom:

Image

New Blog Posts 115

New Blog Posts 117

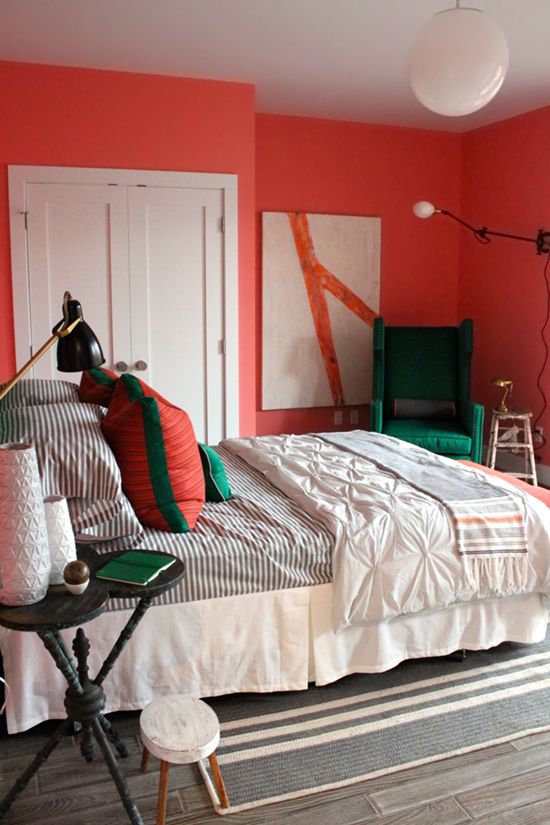
Most of my colored items are kelly green and gold/leopard, which have been infused all over the living room. Other than that, I have a great coral blanket and some old salmon Euro shams similar to these … I know I will always love green… Eureka! I was reminded of a house I pinned which combined forest green with salmon pink (via Dustjacket Attic).

Forest Green and Salmon - Torie and Tristan

Once I started looking over my Pins, I found a few more instances of this fun combination (Pixlis, Dwell):Forest Green and Salmon 2 - Torie and Tristan Forest Green and Salmon 3 - Torie and Tristan

In bedrooms (via Coco & Kelley):Forest Green and Salmon 8 - Torie and Tristan Forest Green and Salmon 9 - Torie and Tristan

One can imagine what a bathroom might look like (both via Painted Furniture Online):

Forest Green and Salmon 4 - Torie and Tristan

Forest Green and Salmon 5 - Torie and Tristan

An office (via simplyme091909.blogspot.com):Forest Green and Salmon 12 - Torie and Tristan

A kitchen (Gah! There’s no chance Tristan would ever go for this) via Elements of Style:

Forest Green and Salmon 6 - Torie and Tristan

Swatch 1 (via Design Seeds):

Forest Green and Salmon 7 - Torie and Tristan

Swatch 2 (via Pinterest):

Forest Green and Salmon 11 - Torie and Tristan

This is probably a realistic level of color for our room (via Shelter Interior Design):

Forest Green and Salmon 10 - Torie and Tristan

I think that by adding this one custom accent pillow from Etsy ($26) and printing out a few new art prints, this look can be ours:

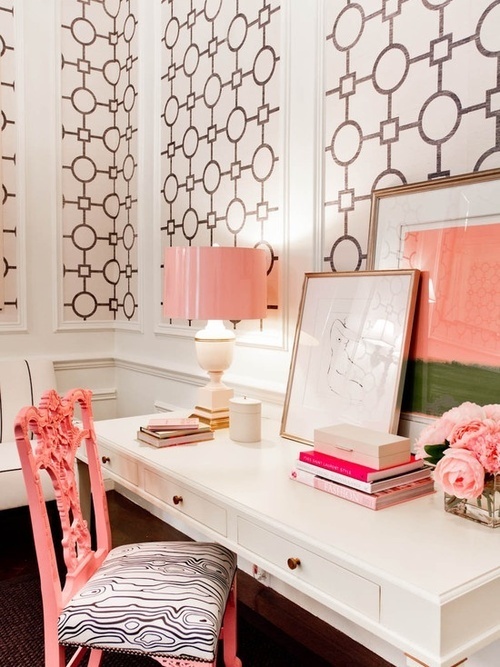
Forest Green & Salmon Pink Bedroom via Torie and Tristan

Get this look:

  • White Euro Shams with Black Trim – $30 each from Ebay (I made mine using white velvet Euro shams from IKEA and ironing on black ribbon tape – they’ve lasted 3 years)
  • Salmon and White Euro Sham – $22 each from Etsy
  • Coral/Salmon Blanket – Similar throw $51.97 from Bellacor (mine is old from Pier 1)
  • Accent pillow – $26 from Etsy
  • glassybaby – $44 in Leprechaun
  • Topiary – Image from Tuckernuck (sold out); similar here ($49.99)
  • Art – Pinned from Kelly Wearstler My Vibe My Tumblr

What do you think of my inspiration board? It might take me awhile to track down my pieces from storage, but nothing makes me more excited than re-working things I already have.

-t&T

cropped-tt.jpg

DIY Manicure #5

Sally Hansen Salon Effects Nail Strips

Salon Effects - torieandtristan  Salon Effects - torieandtristan  Salon Effects - torieandtristan

1/2/3-unknown

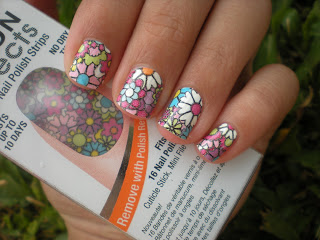
I received (by request) Sally Hansen Salon Effects Nail Strips in my stocking this Christmas (same as top right photo, Misbehaved 350, $9). I was wearing silver tones on New Year’s Eve, so obviously that was NOT the time to debut these gold-tone strips.

The next opportunity was at Seattle Metropolitan Magazine‘s Best Dressed Party a few weeks ago. Let’s be clear: I was an attendee, not a nominee. But given the theme, I still wanted to bust out all the stops! The event actually showed promise of being devoid of any Costco-brand jeans and sandals, which is guaranteed to appear multiple times at nearly any Seattle event, no matter how formal. Such is life in a tech company hub.

Anyway – back to the nails. The night before the event, I busted out the strips and got to work. There are several steps.

DIY Manicure 5 (1)

Here’s the real scoop: for each nail, you need to first figure out which strip fits the best. When you’re ready to go, you peel off a back layer and a front layer and are left with a flimsy piece of dried nail polish. It even smells just like nail polish! You squish it on to each nail and file off of the excess. It took awhile to figure out how to best maneuver each strip, but I somehow made it through without completely butchering any nails (and there are eight extra strips in each kit in case you do mess up). In some cases, I also had to try to remove excess polish from the sides of my nail because the strips ran really wide. Admittedly, my hands are on the small side, and trimming was not the end of the world, but like, who are these wide-fingernailed people they are trying to appease?! They are really wide, people.)

About an hour later, mission accomplished!

DIY Manicure 5 (3)

As you can see in the below photo, some of the tips didn’t look very secure, and I’ve since heard that adding a top coat is a game changer. Even still, they didn’t peel up for several days, and since it was a pattern, chips were very difficult to detect even when they did start to peel. I would definitely try them again!

DIY Manicure 5 - Torie and Tristan

This concludes our 3 DIY Manicure Trends series and now I’m over nails, onto vegetables. I have some Farmer’s Market vegetable side dishes I’m excited to share with you. If you thought Honey Parmesan Roasted Brussels Sprouts was amazeballs, you’ll want to meet my new friends, the carrot and the squash.

-t&T
cropped-tt.jpg

DIY Manicure #3

Today, I’ll show you my “Natural Sheer Shine” DIY. As a refresher, here are the inspiration images.

Natural Nail - TorieandTristan

Natural Nail - TorieandTristan

Natural Nail - TorieandTristan

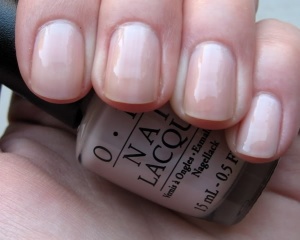
But the real inspiration is my coworker. She had the privilege of attending the Golden Globes this year and had the most flawless nails when she returned to the office. I assumed some LA manicurist-to-the-stars was to blame, but imagine my delight when she said she did her nails herself, and did I want to borrow the polish? DID I?! OMG!

She used Deborah Lippmann’s Sarah Smile ($18).

I gathered up my nail tools including my new top coat obsession, CND Vinylux Weekly Top Coat ($6.95 here).

DIY Manicure 4 (3)

After two coats of Deborah and my top coat, voila!

DIY Manicure 4 (6)

Some natural skin-toned polishes clash with my skin tone or end up looking the exact same color as my skin (barf!). I was really happy with how this particular polish looked on my skin tone. Plus, neutral tones aren’t nearly as obvious when they chip :).

I don’t know about you, but when I’ve used a nail polish that is truly sheer, it often ends up looking uneven depending on how many brush strokes each part of the nail had. OVER IT! This nail polish was fairly opaque, but with the shiny top coat, it still gave off the desired natural affect.

Overall, this was an easy one. A warm up, if you will. But if it’s good enough for the Golden Globes, it’s good enough for me!

-t&T

cropped-tt.jpg

3 DIY Manicure Trends

Let’s just admit it – shellac is the best nail beauty development to hit the earth since perhaps the chemistry miracle of nail polish itself. The only problem is, as with all beauty routines, there is a recurring cost involved, and it’s more expensive than just a standard manicure ($25-35 in Seattle).

When I got married, I thought I’d help us cut costs by quitting shellac and instead hype myself up about trying new nail trends I’d seen on Pinterest. As I type this, I have shellac on my nails. BUT I’ve only had it twice since I’ve been married (seven months now!) AND it was a birthday present. Nobody’s perfect.

Anyway, I have hyped myself up a few times and tried some new nail trends. Throughout the week, I’ll show you a backlog of manicure trends that I’ve attempted to DIY over the last few months.

Three DIY Manicure Trends - Torie & Tristan

A sneak preview of the trends are:

Natural Sheer Shine

Natural Nail - TorieandTristan

  Natural Nail - TorieandTristan

Natural Nail - TorieandTristan

1-unknown/2/3

Metallic Ombre

Metallic Tip - torieandtristan

Metallic Tip - torieandtristan

Metallic Tip - torieandtristan

1/2-unknown/3

Sally Hansen Salon Effects Nail Strips

Salon Effects - torieandtristan

Salon Effects - torieandtristan

Salon Effects - torieandtristan

1/2/3-unknown

None of these are pictures of my nails, so stay tuned for the reveals in three upcoming posts. Share in the joy of my successes and weep alongside me at my failures. And in case you’ve missed previous posts in this series, here they are:

DIY Manicure #1

DIY Manicure #2
-t&T

cropped-tt.jpg

Blue Apron Takes the Logistical Blues Away

One of the ways I have streamlined my lifestyle in 2014 is through a meal delivery service called Blue Apron.  I talk about it more on this post, but essentially it sends ingredients and recipes for three meals each week to your doorstep, and you can skip weeks whenever you want. Average cost is $10 per person per meal, or $60 a week. There is  a meat and vegetarian option.

Dec 29 2013 118

Dec 29 2013 119

I personally wouldn’t do more than two shipments a month, because our schedule tends to ebb and flow with busy-ness around dinner time.  Instead of being less stressed by Blue Apron, I’ve been more stressed during busy weeks because I was worried our meals would go to waste. It’s nice to take off-weeks and eat normal dinners, like cereal and hot dogs.

Here’s what I like about it:

  • You only need salt, pepper, and EVOO on hand to do any of the recipes. Everything else is shipped in the most adorable little baggies and packages.
  • Tristan likes the food and the program, and helps out with the cooking – bonding, aw.
  • I’m able to enjoy the cooking process and learn new techniques without the stress of meal planning and shopping.
  • The meals have only taken around 30 minutes to prepare and have had quite a range of flavors and formats.
  • The ingredients are all seasonal and fresh, some of which I would’ve had no motivation to explore if left to my own devices. A good example of this would be bok choy and treviso.
  • The recipes are easy to follow and well thought out – there are photos and a timeline; there’s not that panic at the end, when I’m cooking on my own and everything seems to be burning at the same time.
  •  The recipe cards are laminated with measurements so we can make the recipe again, if it was a hit. And call me old fashioned, but I don’t have a tablet and I’m real sick of trying to keep my cell phone from timing out every five minutes while I’m trying to follow a recipe. It’s been nice having the old-school recipe sheet.
  • They often have you use the same pan for multiple steps and everything comes in pre-measured packages, so there’s no ingredient waste and a lot less cleaning. A very high-ranking perk for us.

What I don’t like:

  • I mean, nobody wants to pay $60 a week for three meals when the afore-mentioned cereal will run you $3. But I will say, when I’ve tried new recipes in the past, a single ingredient can run me $7 (i.e. spices).
  • There can be a lot of chopping, depending on the recipe. Get a garlic press FOR SURE.
  • It’s despairing if you realize you forgot to skip a week online and immediately receive a shipment. Kiss those happy hour plans goodbye! You can skip several weeks at a time, though.
  • Some people don’t like seafood. There isn’t a way to select to receive specific meals, or omit the seafood dish from the meat option. It’s a prix fixe menu.
  • As mentioned, I looooove all the little packages and baggies the ingredients come in, but some of my eco-friendly Seattle neighbors might find all of the packaging wasteful.
  • I’ve had a few ingredients go bad by the end of the week, as fresh produce has a tendency to do. Nothing disastrous; I was able to salvage them all. But it’s as if I expect the produce they send me to have super secret life-extending powers (…and for $60, shouldn’t it?!).

We’ve made six meals thus far – here’s some photos:

Roast Beef with Horseradish Sour Cream & Grilled Treviso

Roast Beef with Blue Apron - TorieandTristan.com

Chopped Chicken, Bacon and Brussels Sprouts Salad with Blue Cheese, Currants and Sherry Vinaigrette

Chopped Chicken Salad from Blue Apron

Cioppino Tagliatelle with Bay Scallops, Crusty Bread & Garlic Aoli

Scallop Dish from Blue Apron - TorieandTristan.com

Scallop Dish from Blue Apron - TorieandTristan.com

Minute Steaks with Picadillo-Style Sauce & Yellow Rice

Steak at Blue Apron - TorieandTristan.com

Steak at Blue Apron - TorieandTristan.com

Steak at Blue Apron - TorieandTristan.com

Pan-Seared Cod with Soy-Maple Glaze, Baby Bok Choy and Rice Noodles

Cod from Blue Apron - TorieandTristan.com

Cod from Blue Apron - TorieandTristan.com

And, Tristan and I agree that this was our absolute favorite – Chicken Wedge Salad with Crisp Apple, Walnuts, and Lemon-Blue Cheese Dressing

Chicken Wedge from Blue Apron - TorieandTristan.com

Chicken Wedge (15)

****

If you’d like to give Blue Apron a try, TODAY through Feb. 2 Gilt City is offering 50% off your first Blue Apron shipment when you purchase from the mobile app. A coincidence, being “Blue” Friday? I THINK NOT… Go Hawks!

Let me know if you decide to give it a try and what you think!

-t&T

T&T

A Torie & Tristan Tree!

This year, I was really inspired by the worded bunting trend, and wanted to incorporate it into our tree-scape. I just made up both of those terms – “worded bunting” and “tree-scape” … but you still with me?

This Michael’s Dream Tree from eighteen25 is one example of worded bunting:

Michael's Dream Tree

Here’s another:

Tree Inspiration 1

And Pottery Barn:

Pottery Barn

As I mentioned earlier, I really wanted to spice up my Christmas decor with some red this year; a tree sign like the above being one of the simple DIY ways to accomplish this. Since you need to buy each letter separately ($1-$2 each), I originally was going to do “FA LA LA”  as the words, since less letters equals less $$. But, I wasn’t sure how well that would lay spacially across the tree.

Since Tristan and I are Christians and my shopping/gift-obsessed self can always use a reminder of the Reason For The Season, I thought something Christ-y would be ideal. “O Come Let Us Adore Him” would’ve cost a small fortune in wooden letters, so I ultimately went for the abbreviated “Christ Is Born”:

Tree

Torie & Tristan's Tree

Here’s a close up. The red is a bit brighter and more coral in person, to match the new pillows on the couch.

Torie & Tristan's Tree

For this project, I got the whole family involved. Tristan and I painted two coats on the back and front of each letter, then I hot glued each letter to twine, leaving about a foot on each end of extra twine. I have CHRIST on one strand; IS BORN on the other. It was actually easier than I thought it’d be to affix the sign to the tree; I just tied the extra twine to a branch.The total project cost $20, not including the glittery bow ornaments on each end.

I give this worded tree trend a shelf life of one more year, after which time I will need to find something else to do with the sign. I think hanging the bunting on a mantle, table or piano will be quite charming. Some peeps are already on board:

Etsy:

Tree Inspiration 5

Pottery Barn via Glitter Guide:

Tree Inspiration 4

What do you think of this trend? What holiday trends were you crushing on this year?

I’ll share the rest of our decor in the next post; I’m thisclose to finishing our inaugural Christmas cards as well.

Happy Christmas Week!

-t&T

T&T

Links of the Week

This is what I’m doing today:

Poodle Lady

Just kidding… I’m going to work. But SOME DAY!

Here are my favorite Halloween costumes I’ve found recently – one, two, three, four, five.

The most charming way to travel: mobile homes. Speaking of mobile homes, I’m very excited to follow my dear friend Bre’s blog, Bon Bon the Blog. She’s a Seattle native like me who just got married (as in, currently on her honeymoon), and will be documenting her experience being a glam girl living in a mobile home in North Dakota as her husband works in the oil fields.

The perfect Girl’s Day In craft.

I KNEW IT COULD BE DONE! A bachelor’s manly living room that prominently features fur.

A DIY Halloween “candle“… could definitely be chic! And how about this bouquet in this vase?

Speaking of DIY, Living for Pretty‘s amazing bathroom transformation.

Image from My Vibe My Life

Happy weekend!

-t&T

Monogram